
How to create infrastructure and deploy it on C4C7OPS.
The goal of this post will be to create an infrastructure project, in this case we will use terraform and C4C7OPS. Some of the things we can achieve by implementing infrastructure projects in our cloud are the following:
- Creation of an EC2 instance in AWS
- Deployment of a Web application on Google Cloud
- Configuration of a virtual network in AWS
- Implementation of a MySQL database cluster on GCP
- Automation of data backups with Terraform and AWS backup
To implement any of these projects, we will need to follow these steps:
- Create our infrastructure project locally.
- Upload it to a git repository.
- Configure our project within C4C7OPS and deploy it.
Once we complete these three steps, we will have a functional infrastructure deployed in production.
1. Create our infrastructure project locally.
1.1. Define the variables we will use.
Create a file at the root of the project called variables.tf and define the following variables and their types:
1.2. Configure our provider.
Create a file called main.tf. For this case, we will use AWS as a provider and use the variables defined in variables.tf to configure our provider. These variables are automatically injected at the time of deployment by the C4C7OPS platform.
1.3. Configure our Terraform instance.
Here we need to define the Backend property of our Terraform. This property defines where the state data files will be stored. Terraform uses persistent state data to maintain a trajectory of the resources it manages.
Go back to our main.tf and define that our Backend will be "http".
1.4. Define an input for the AWS Route53 zone.
Here we will define that the zone property of our AWS Route53 can be set after uploading our project to C4C7OPS using an input called "zone_name". This is to make it more flexible with respect to our future requirements.
1.5. Define the outputs we want to see when uploading the project to C4C7OPS.
Here we will configure certain parameters that we want to see once the infrastructure project is deployed to have greater traceability of our project.
With this, we would have the project ready, and we can move on to the next step.
2. Upload it to a git repository.
2.1. Go to a terminal at the root of our project.
Here we will write the following commands to upload our service to git.
3. Configure our project within C4C7OPS and deploy it.
We go to the C4C7OPS console and log in.
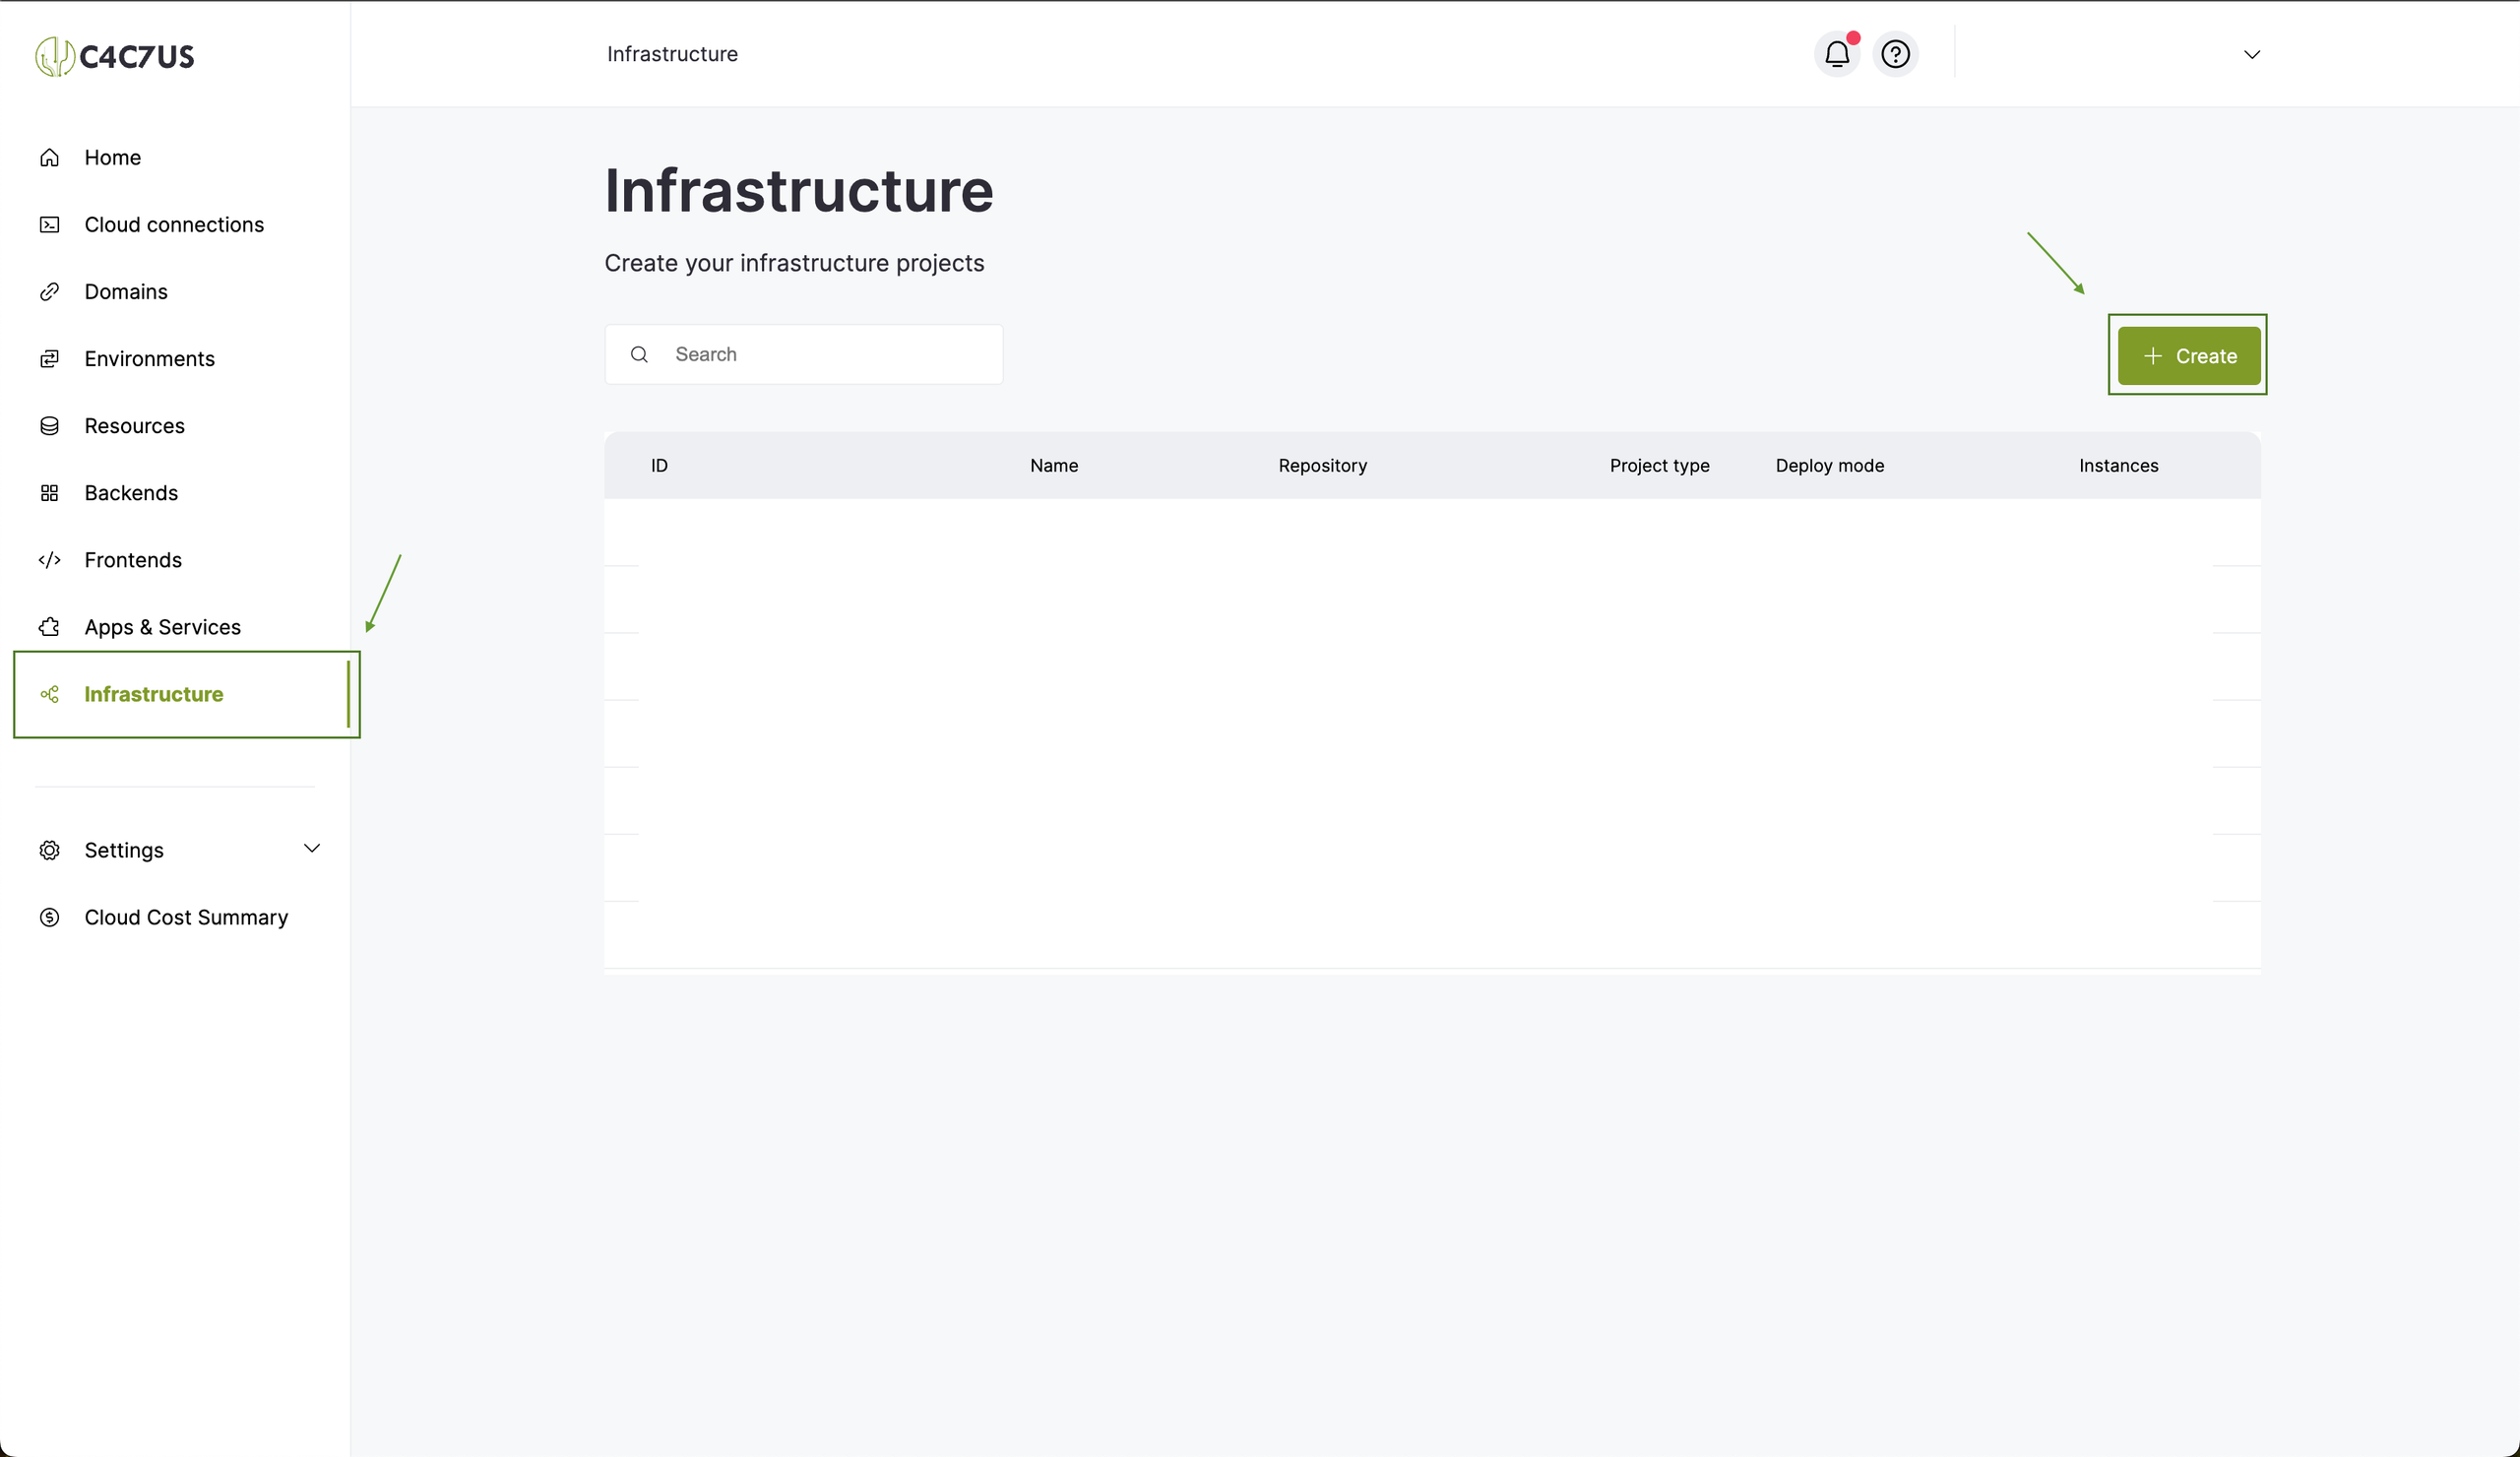
3.1. Go to the "infrastructure" section and press "create".
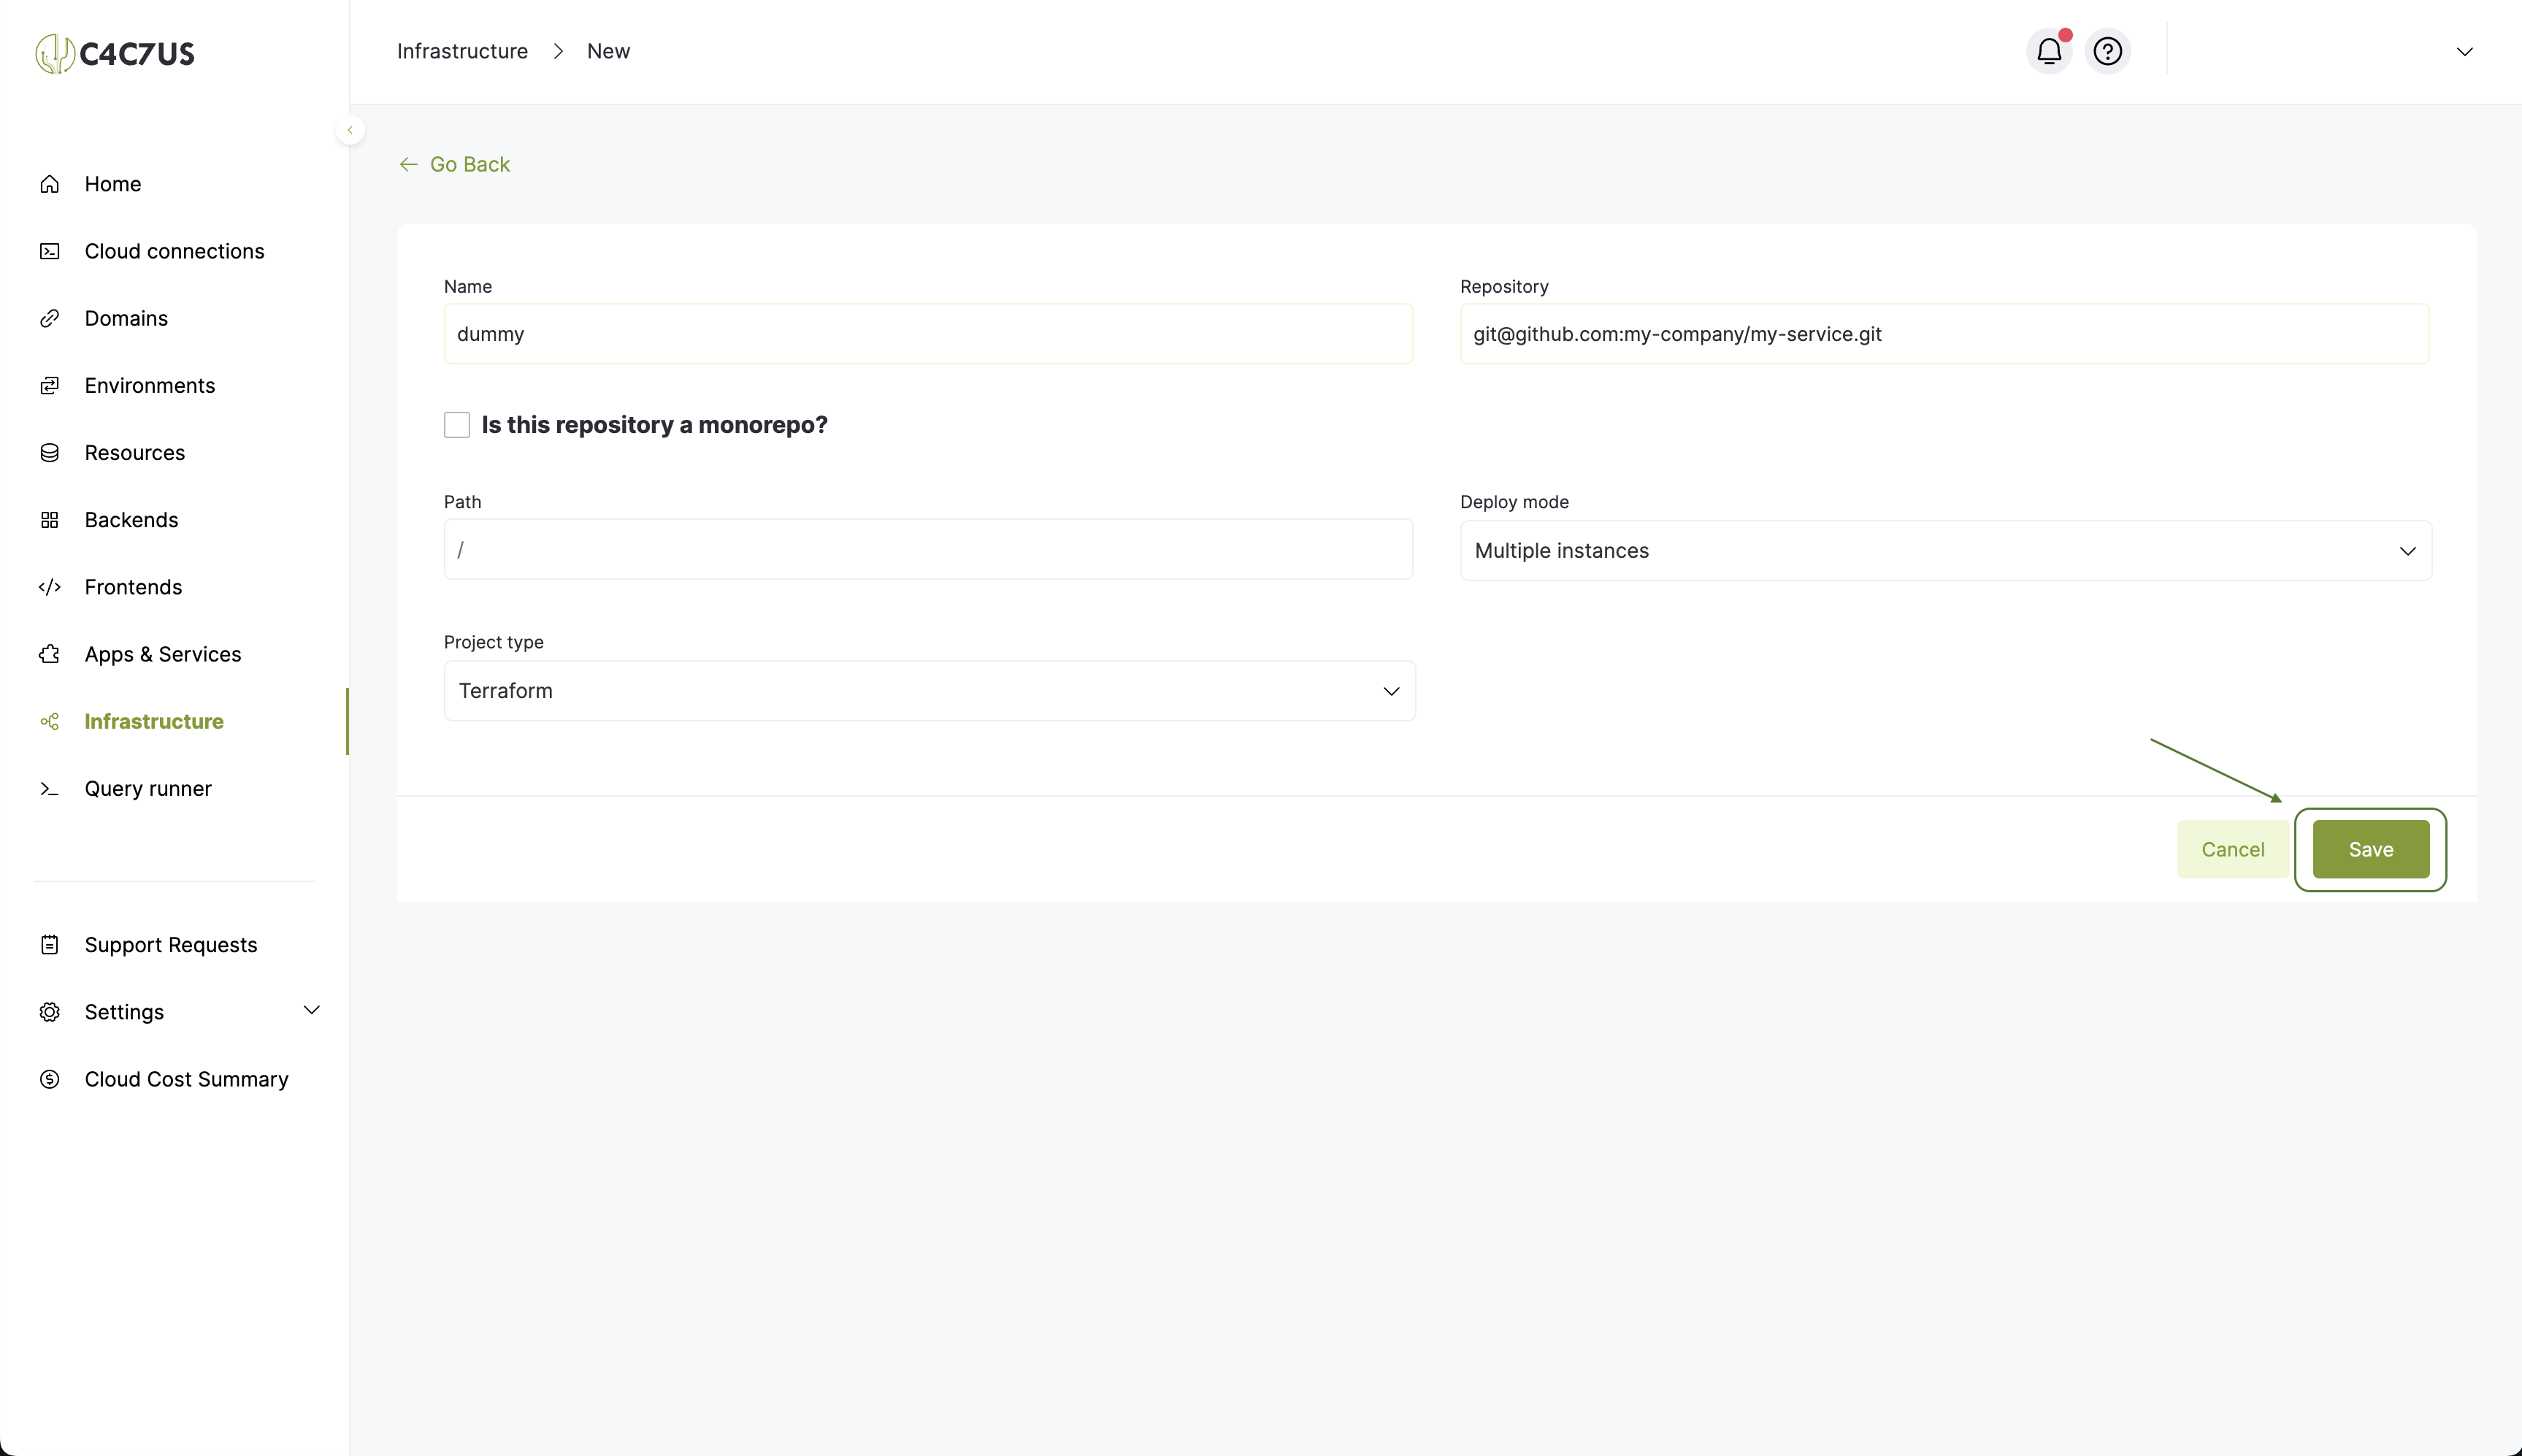
3.2. Configure the infrastructure.
We enter a name, write the repository where we upload the project, it will be a multiple instance infrastructure (deploy mode) and we select the type of project, in this case Terraform.
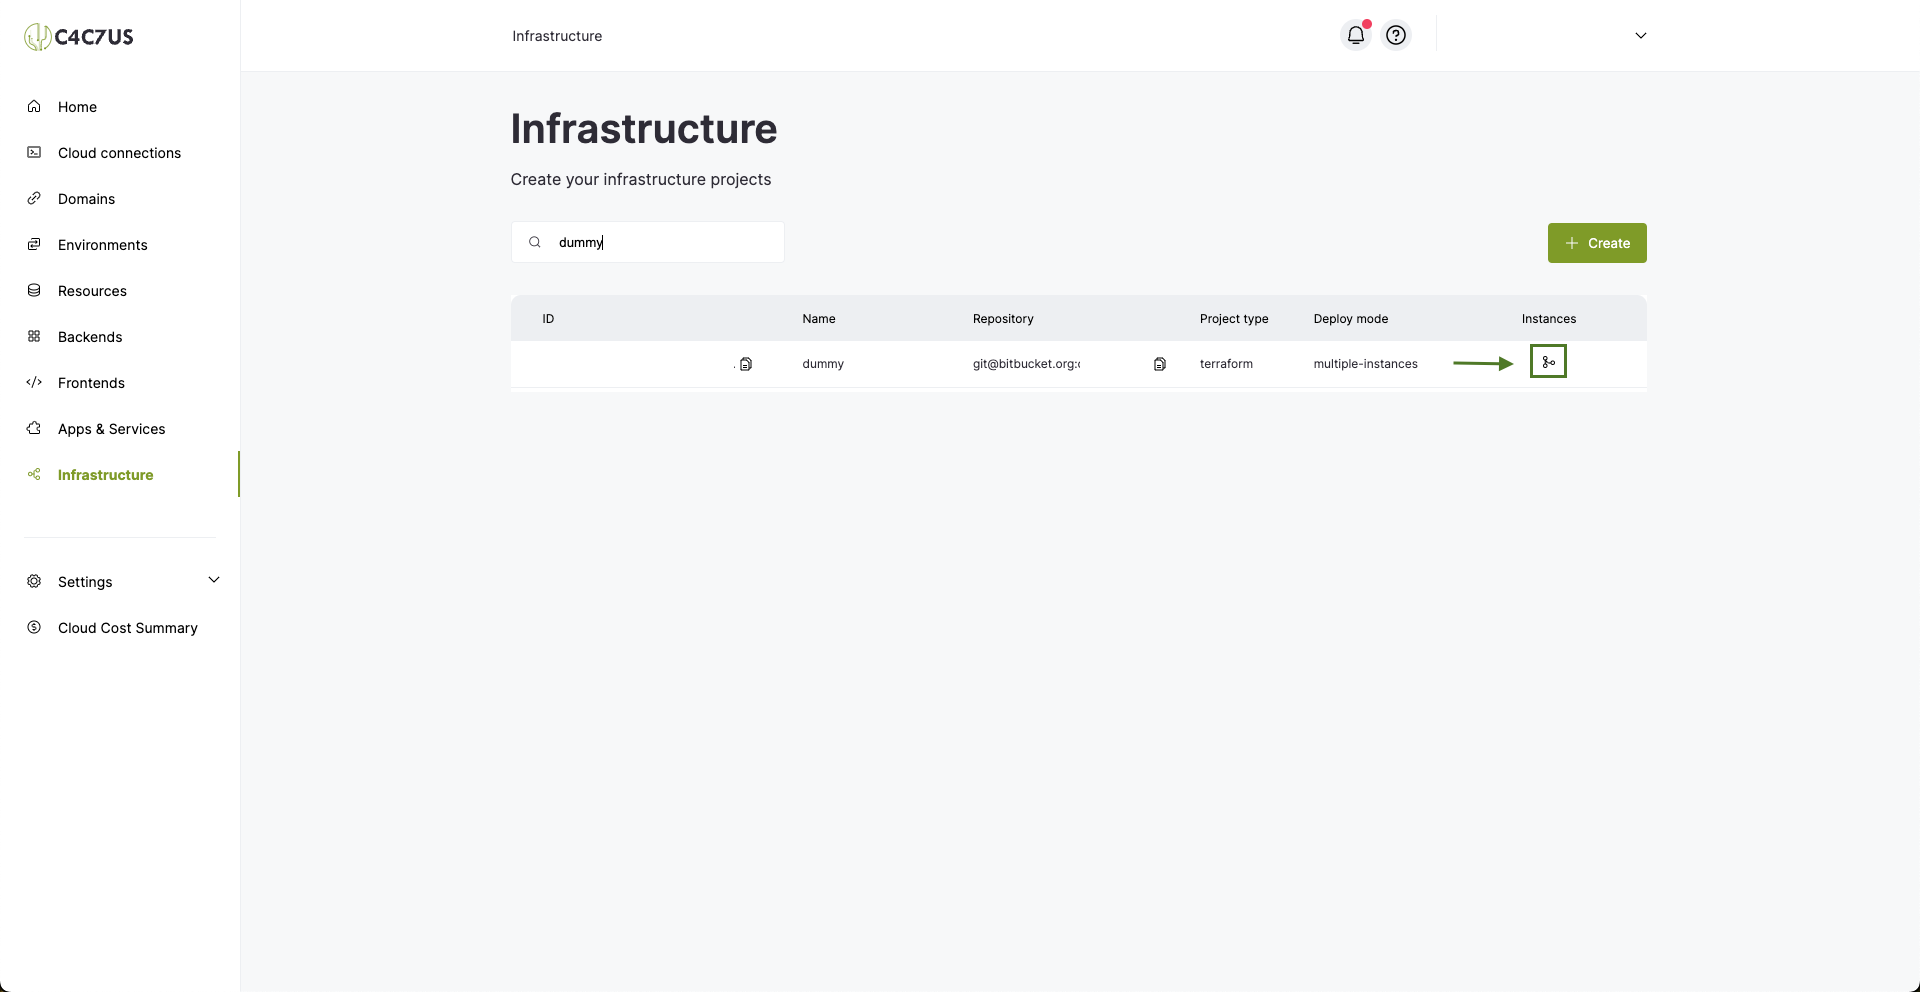
3.3. Our project will be created, and we will go to its instances.
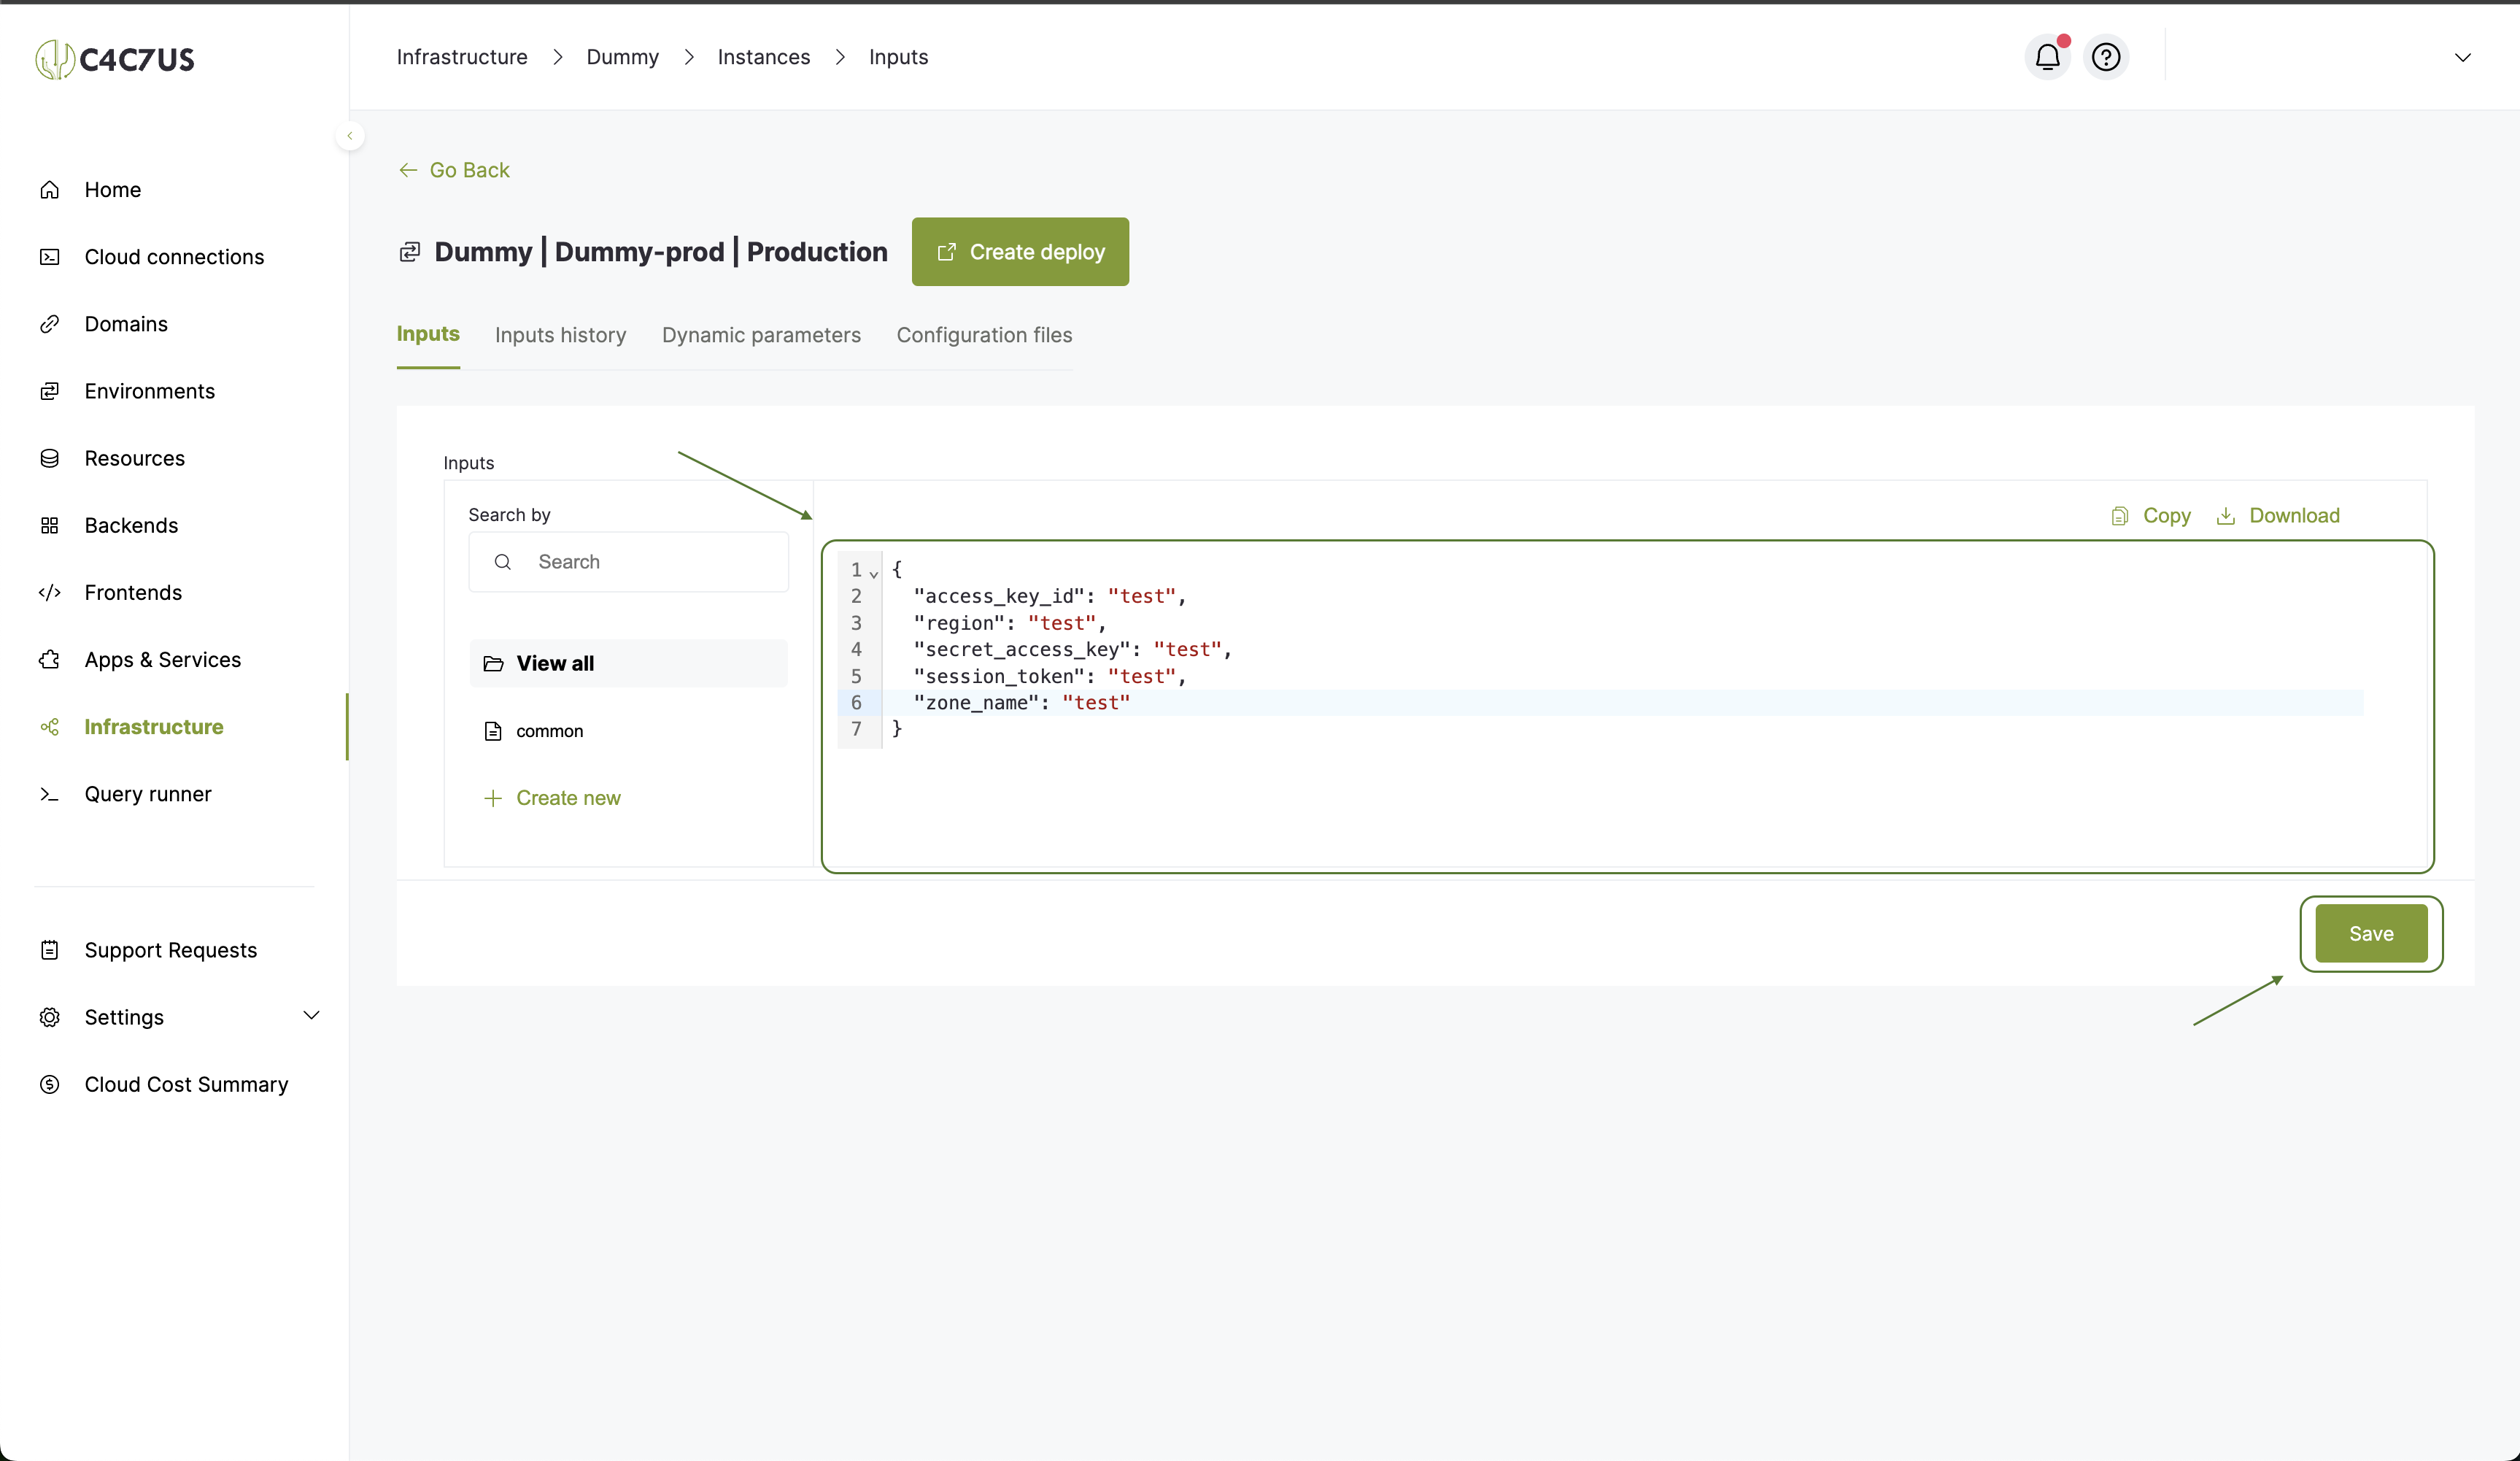
3.4. Select an environment and enter the inputs of the default instance.
C4C7OPS creates a default instance for each environment, and we will work on this one.
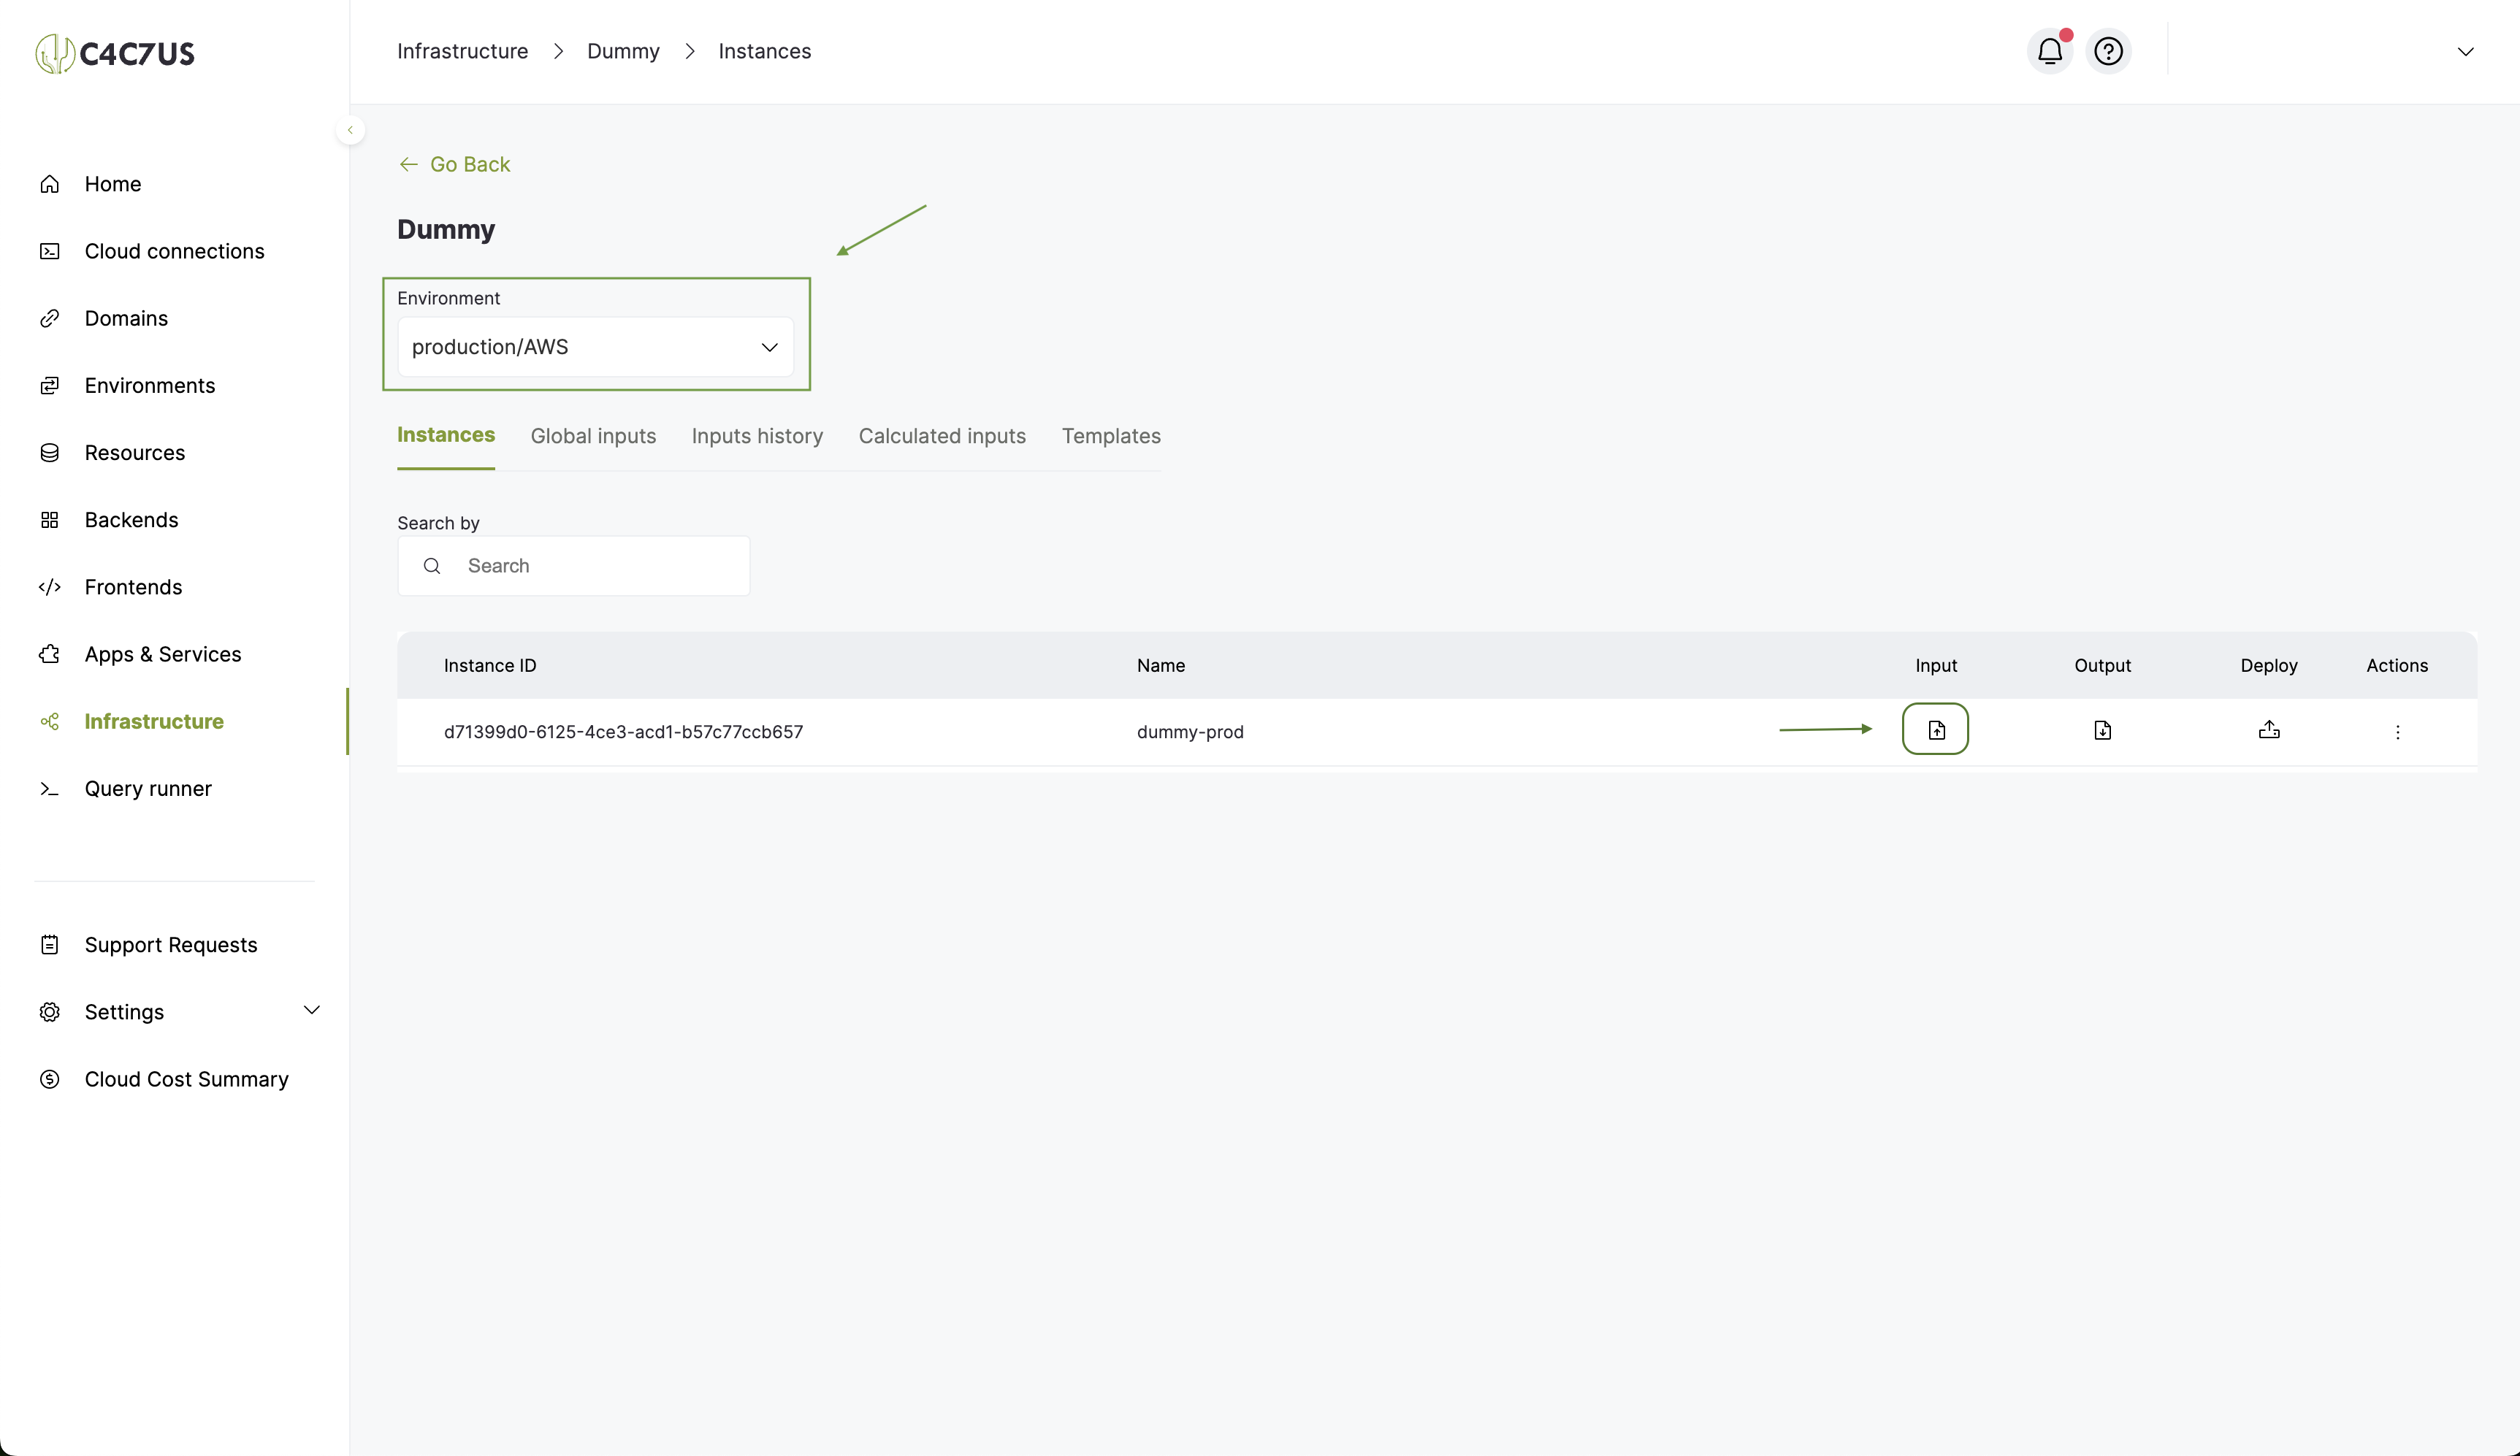
3.5. We define the values of the variables that we added to our project in step 1.1, following a JSON structure, after that we press save.
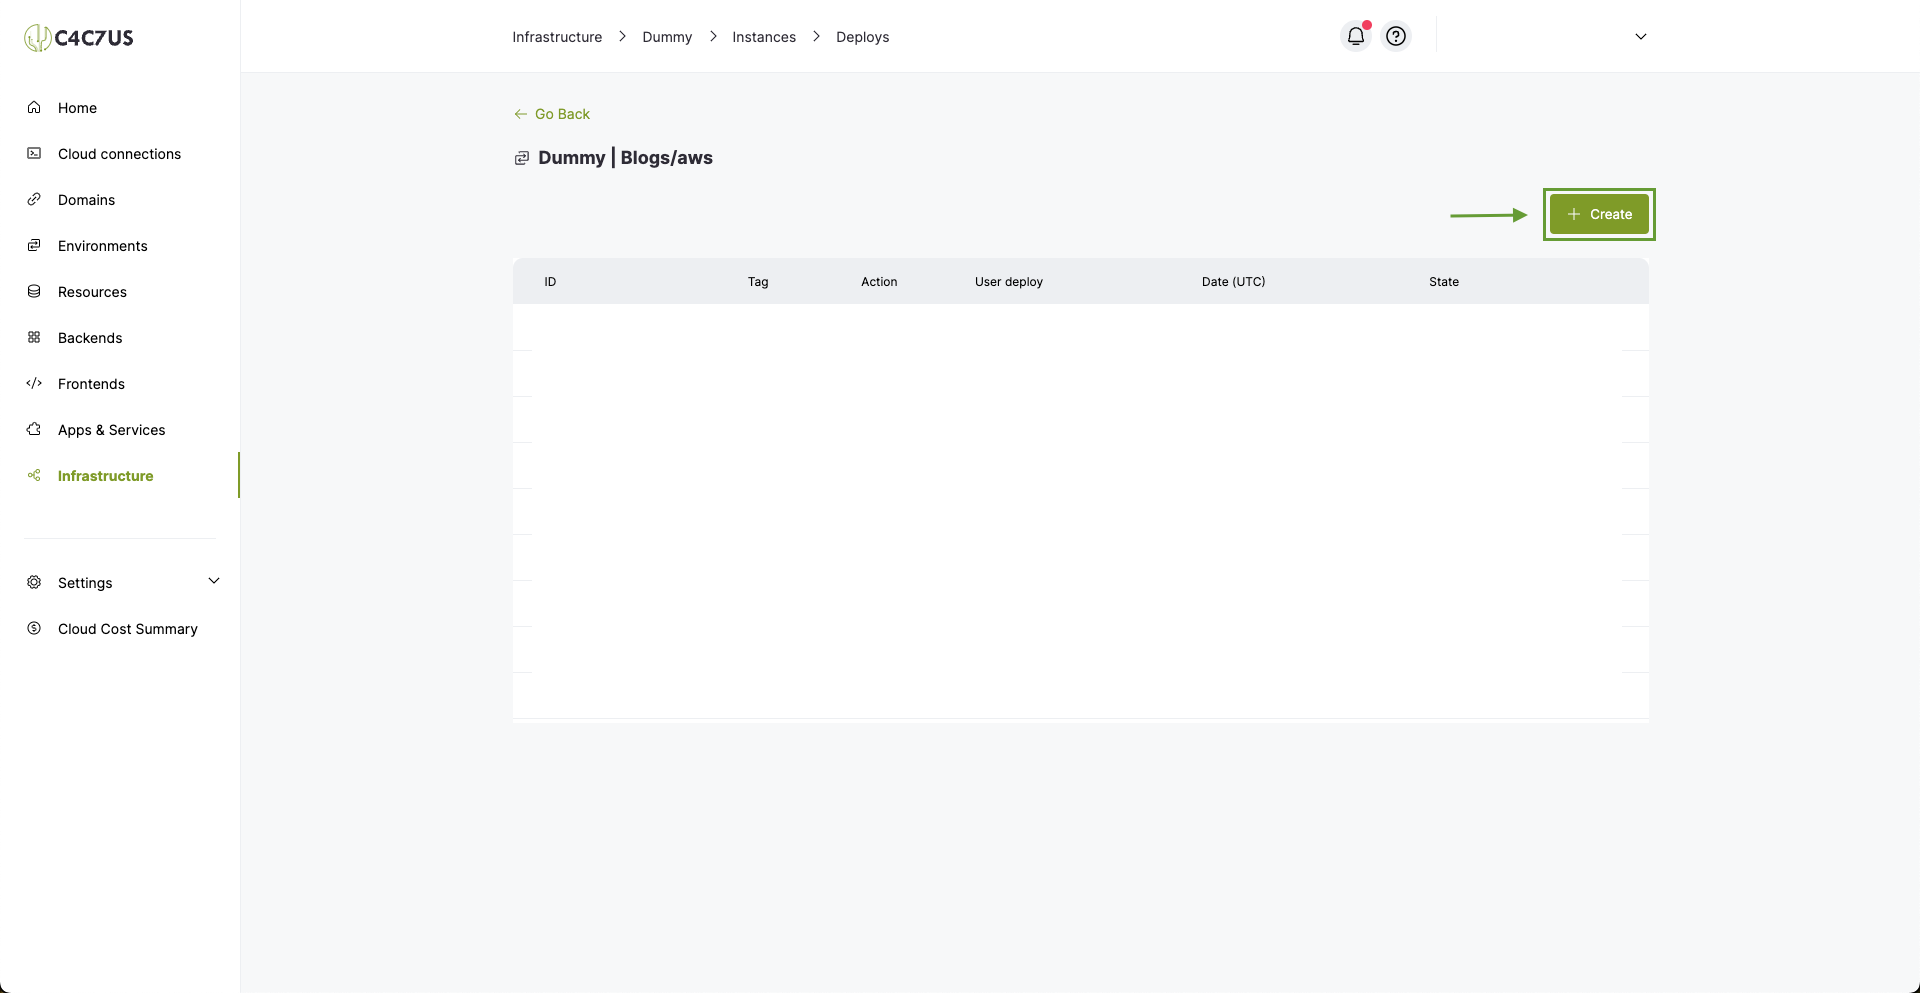
3.6. We will press the create deploy button.

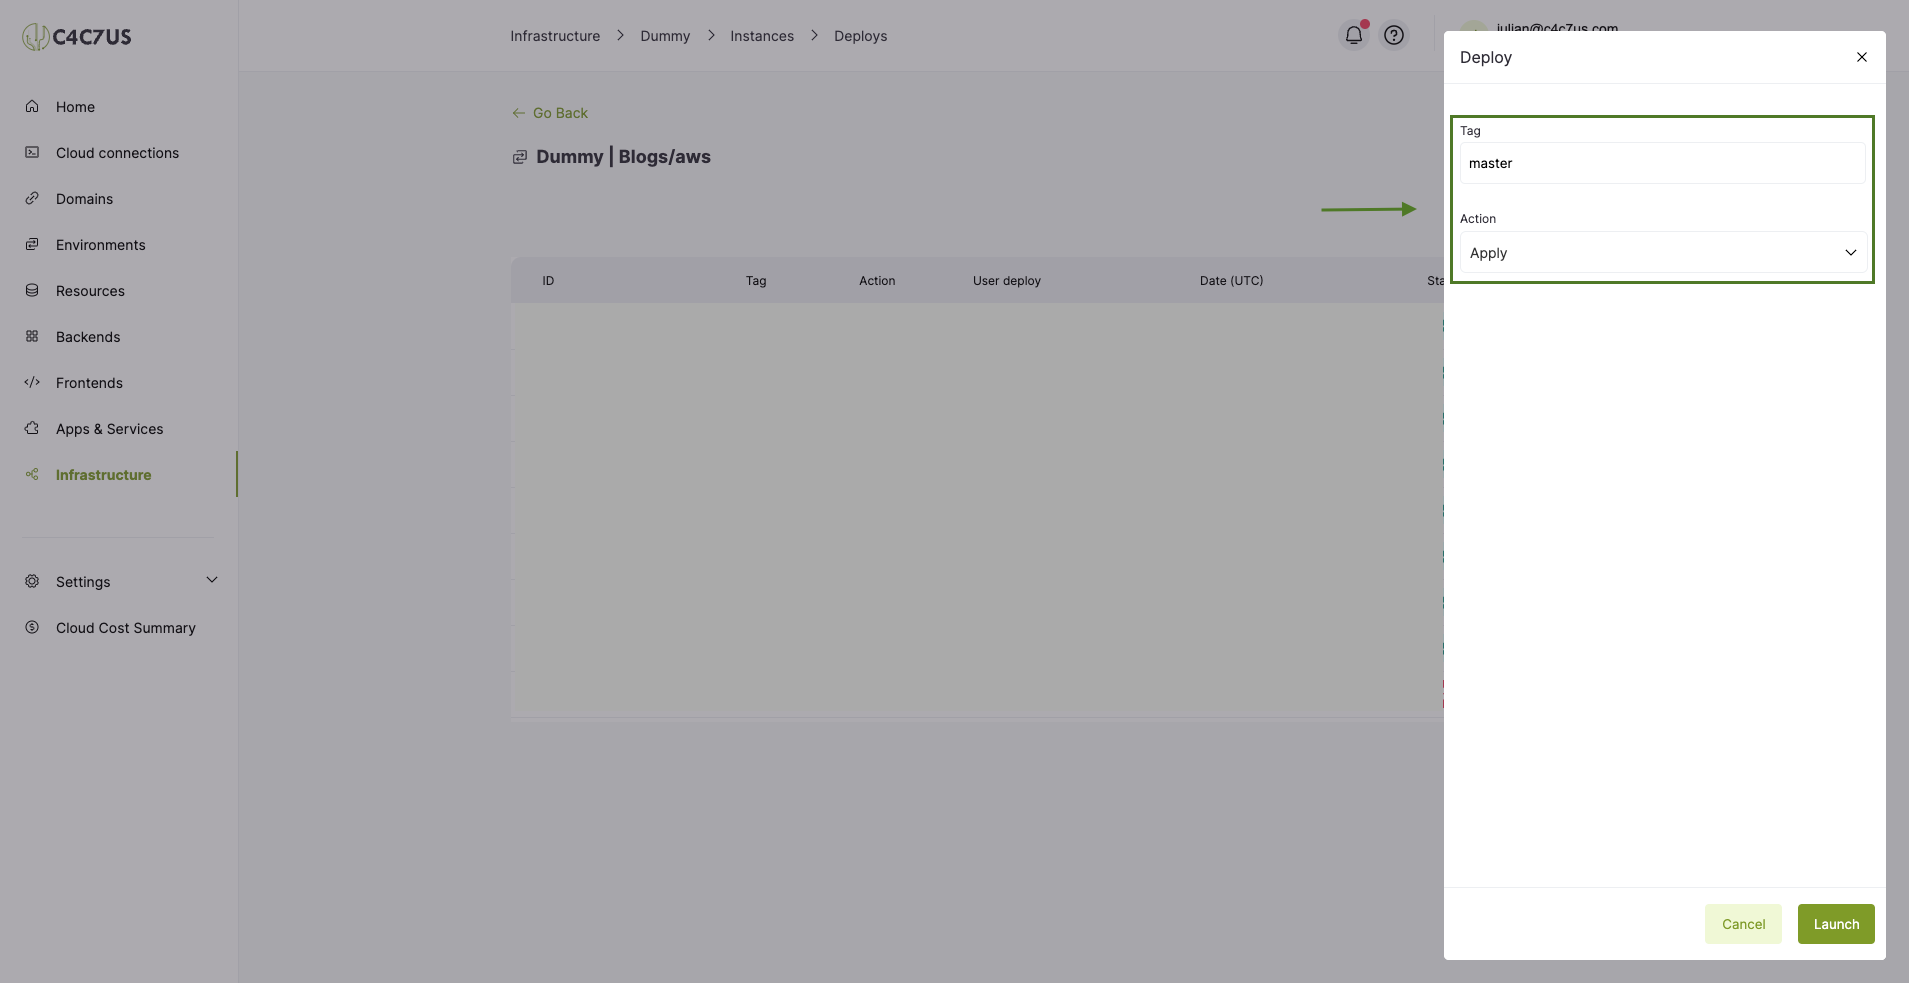
3.7. Here, press "create" and write the name of the branch to deploy, in this case "master".
The "Action" will be "Apply" so that it is reflected immediately. This will take us to the screen with the details of this deployment.
3.8. Completion of the deploy.
Here we just have to wait for the infrastructure to finish deploying, and we will be able to see its logs and outputs.
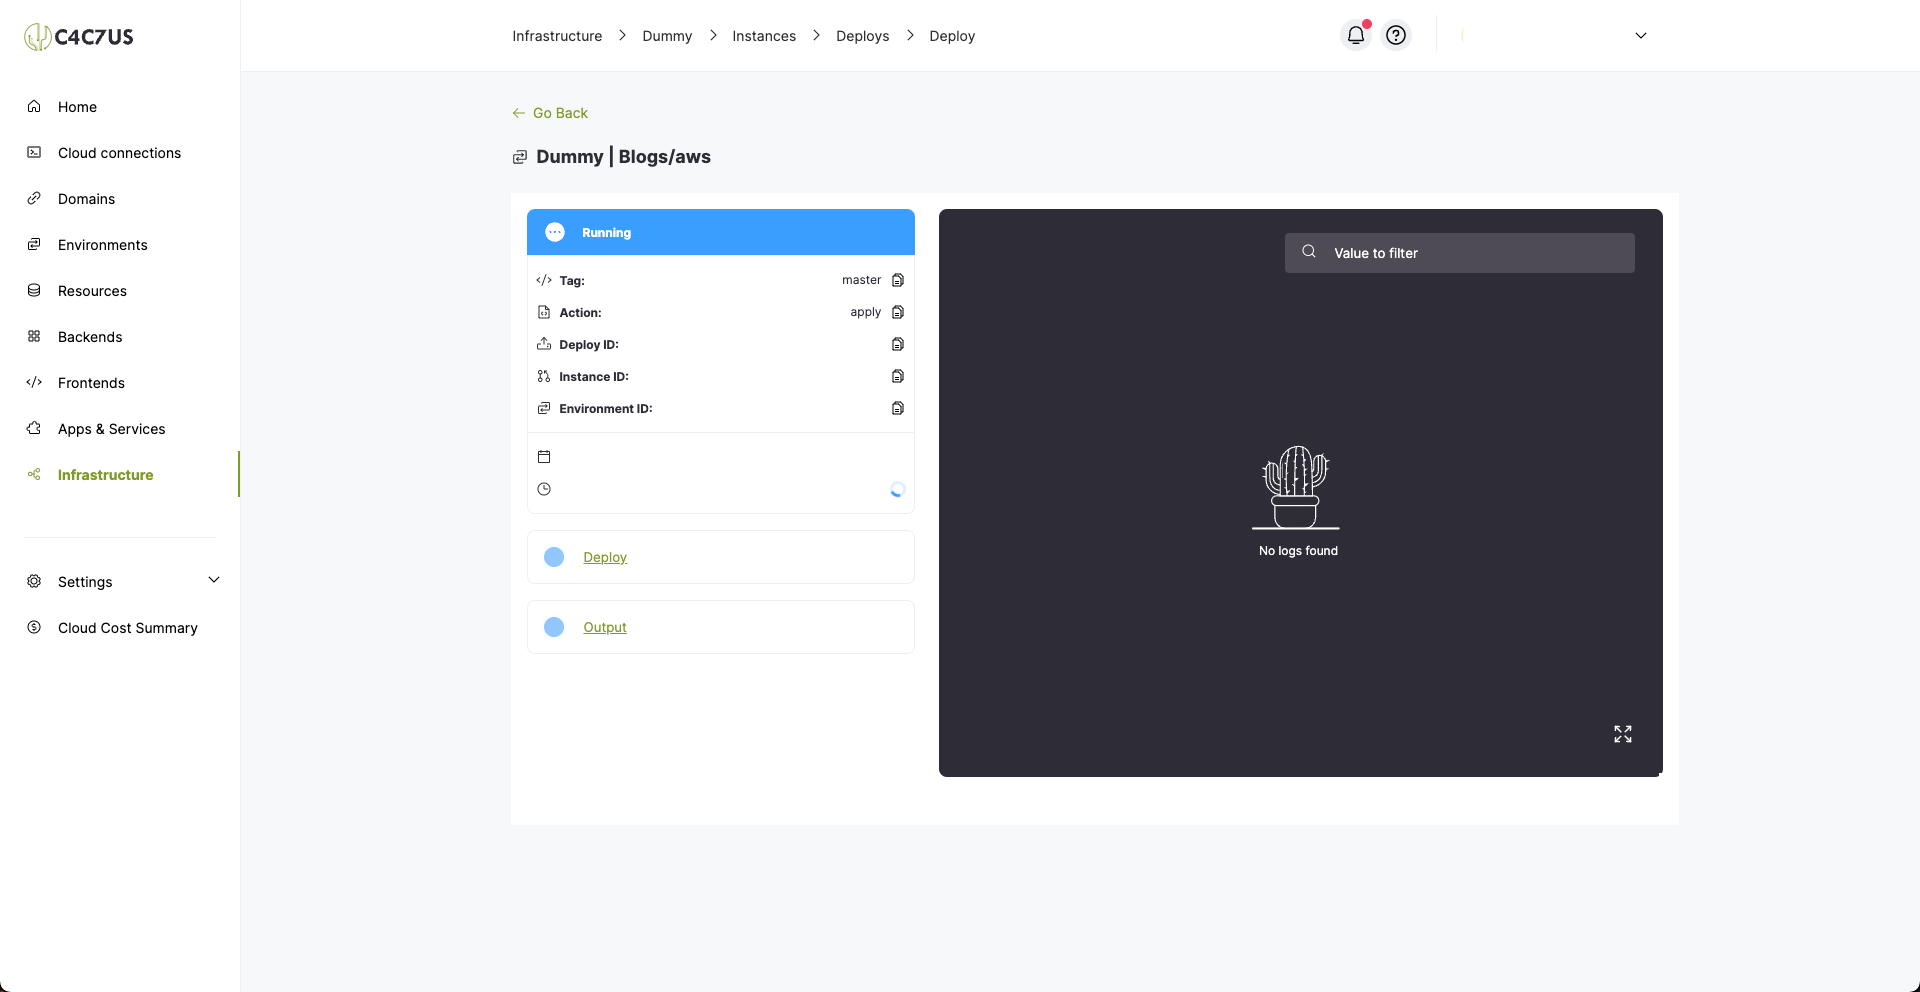
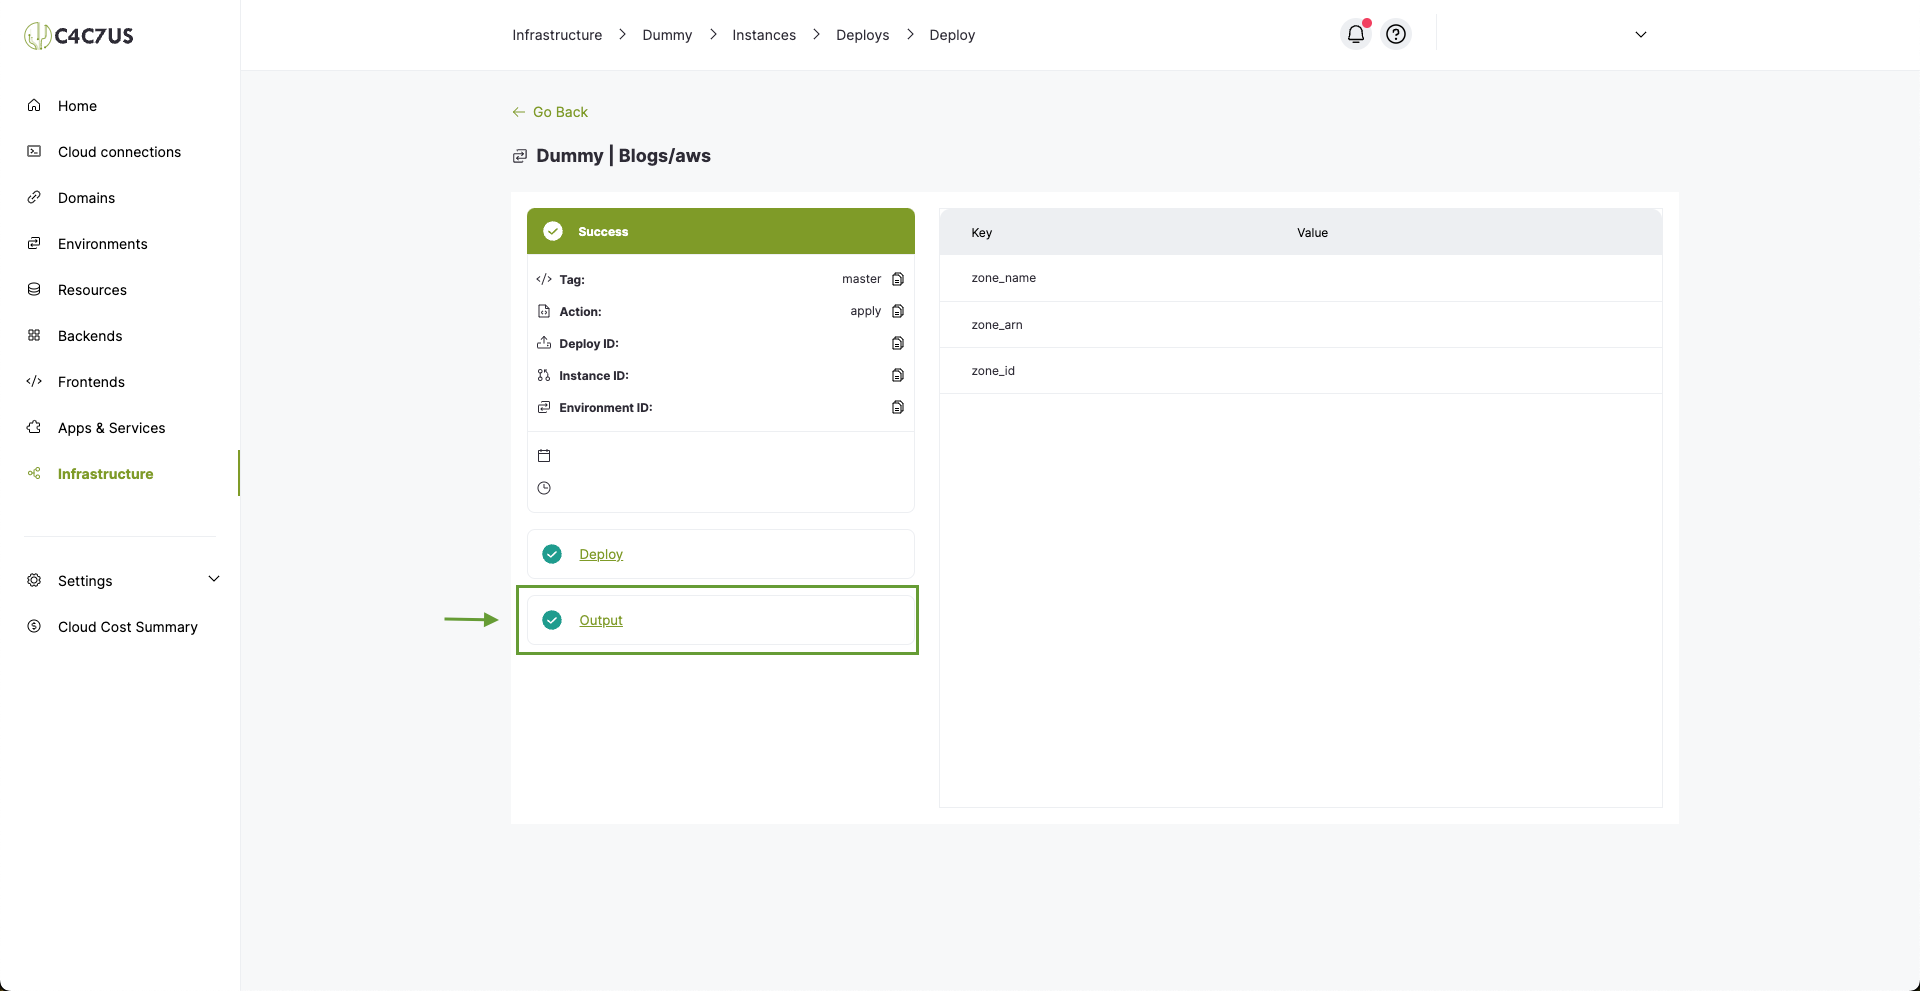
This is how we can see the outputs we defined during development, just click the "Output" button:
Conclusion.
If you followed all the steps correctly, we would have an infrastructure project developed and deployed in production 😎 in just a few steps using C4C7OPS 🌵 with its respective logs and outputs.